- System Requirements
PHP Event Calendar is a out-of-box web calendar/scheduler solution. It will run on web servers that support PHP 5.3 and higher.
- PHP 7.0 or later
- Apache, Tomcat, or Microsoft IIS web server
- MySQL database (more databases support coming up!)
PHP Event Calendar is designed to support multiple database type. The current database supported is MySQL only. MS SQL Server, Oracle and PostgreSQL support will be added soon.

PHP Event Calendar Supports all major web browsers:

- Installation
First of all, acquire a copy of PHP Event Calendar from the download page. Extract the zip file somewhere on your web server.
Create Database
Before start using Event Calendar on your site, create calendar database by executing pec_db_mysql.sql script in MySQL.
Configuration
Once database has been created, specify database connection information in conf.php file. The database table name is “php_event_calendar“.
define('PEC_DB_HOST','localhost'); // database host name or IP
define('PEC_DB_USER','root'); // database login name
define('PEC_DB_PASS',''); // database passworld
define('PEC_DB_TYPE','mysql'); // database type
define('PEC_DB_NAME','php_event_calendar'); // database table name
define('PEC_DB_CHARSET','');
define('PEC_PATH', '/phpEventCalendar'); // URL to PHP Event Calendar folder.PEC_PATH
PEC_PATH represents the absolute URL to the PHP Event Calendar folder on your web server.
For instance, if the URL to get to the PHP Event Calendar is https://www.yoursite.com/phpEventCalendar, or https://localhost/phpEventCalendar, the PEC_PATH should be “/phpEventCalendar“.
if the URL to PHP Event Calendar is https://www.yoursite.com/admin/phpEventCalendar, or https://localhost/admin/phpEventCalendar, the PEC_PATH should be “/admin/phpEventCalendar“,
and so forth.
- Start Using Your Events Calendar
During installation, PHP Events Calendar creates a login similar to the page online event calendar demo. The default login is
name: admin
password: 123456You can change the login credential in “pec_users” table in MySQL. The password is encrypted by MD5 hash. You can generate one here.
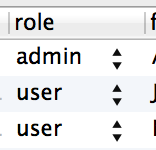
Here’s the SQL query to insert new user into the calendar database table ‘pec_users’ with user role as “user”. You would need to simply replace with some real user data. The password is encoded in MD5. Web-based GUI users management tool will be added in future release.
INSERT INTO `pec_users`
(`access_key`, `activated`, `admin_id`, `role`, `first_name`, `last_name`, `active_calendar_id`, `company`, `username`, `password`, `email`, `timezone`, `language`, `theme`, `kbd_shortcuts`, `created_on`, `updated_on`)
VALUES
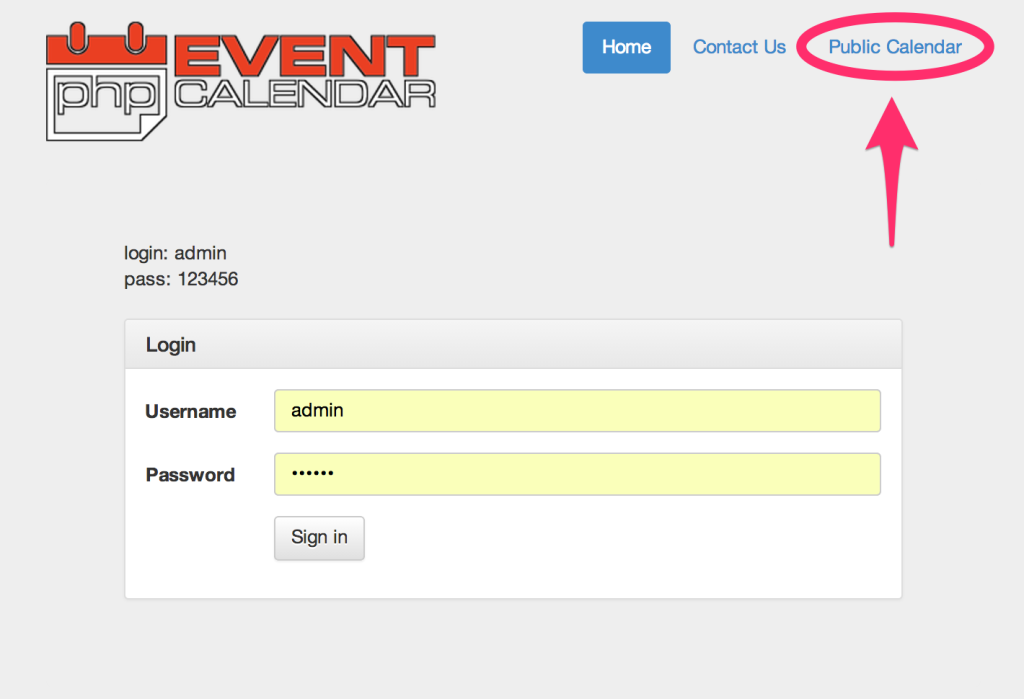
(NULL, 1, NULL, 'user', 'Joe', 'Blow', '0', 'Rand Corp', 'joeblow', md5('123456'), 'joeblow@example.com', '+6', 'English', 'default', 1, NOW(), NOW());Note that the above default user account is an admin account who can create and modify any event. To display events read only, send your users to public calendar page in which the events can be browsed but cannot be modified.
Please note that users who have “admin” role can have access to all calendars of other non-admin users.
The role can only be changed in database table “pec_users”.
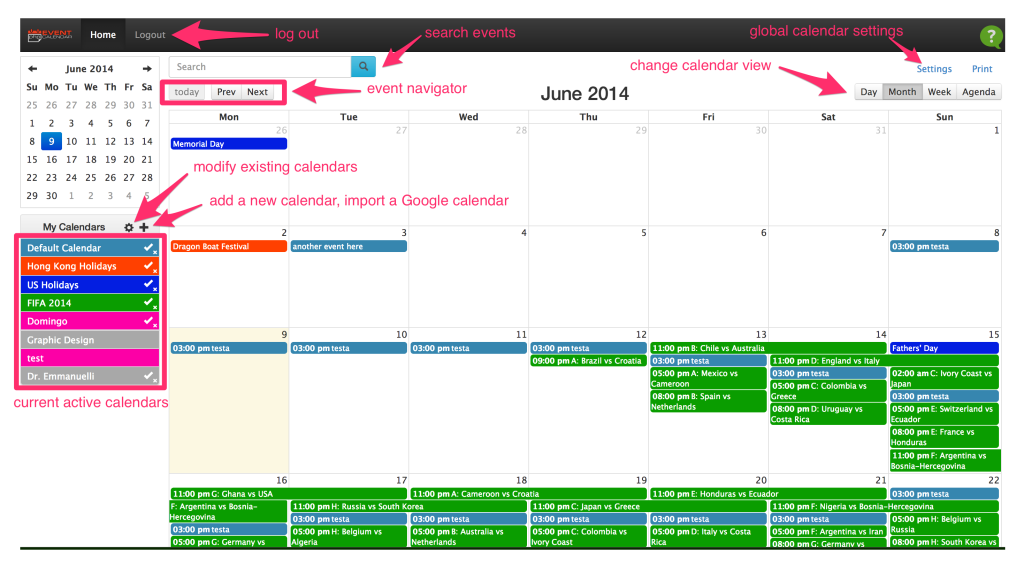
- Calendar Overview
- Add New Calendar
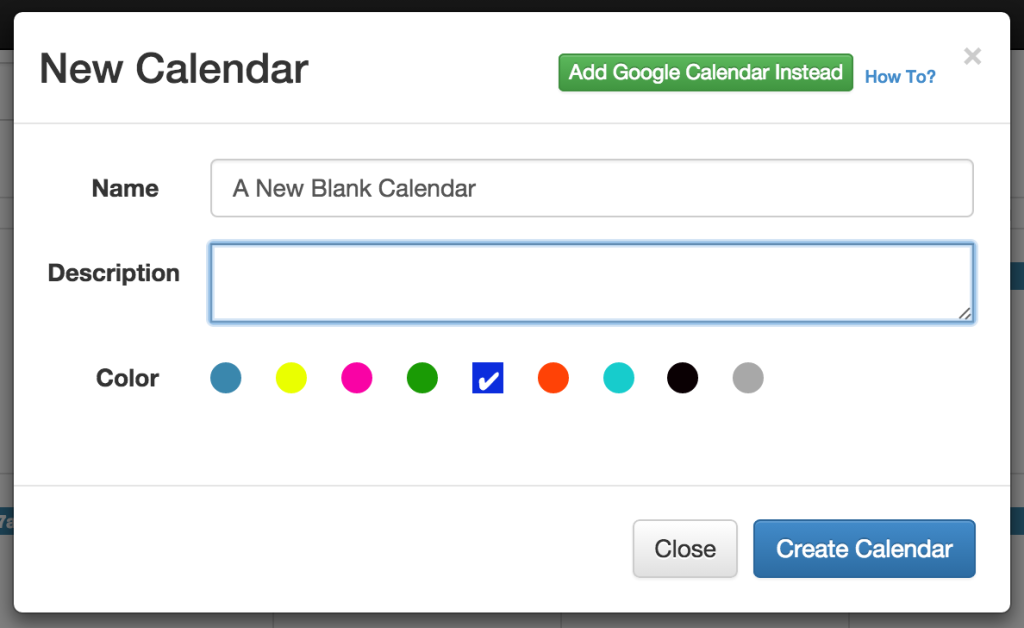
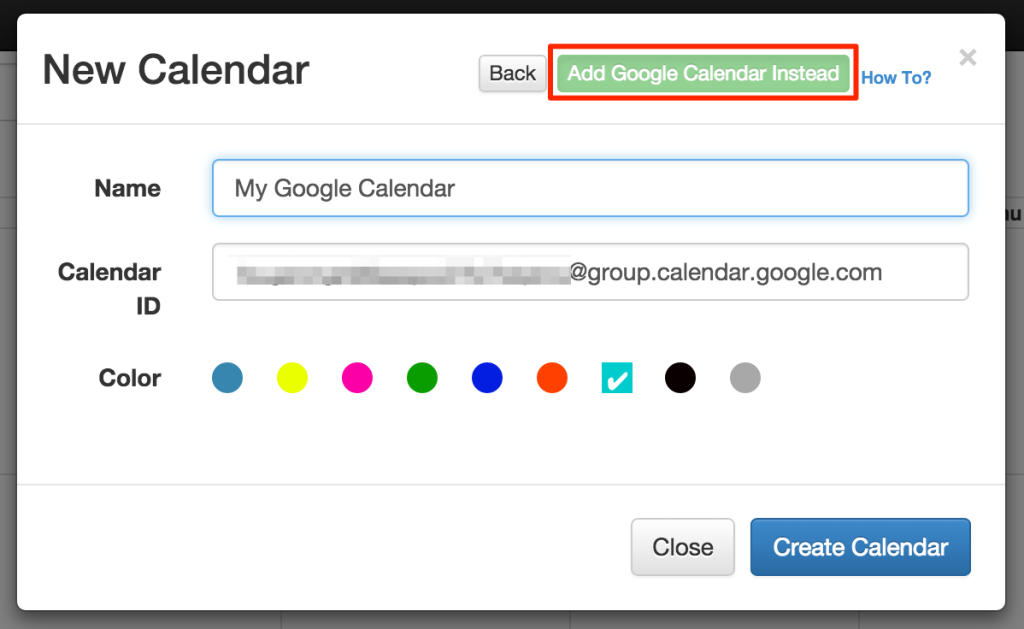
It’s easy to add a new blank calendar or directly import a Google Calendar by click “Add Google Calendar Instead” button in New Calendar window.
Create a New Blank Calendar
Click on the plus sign “+” on the calendar list in the left sidebar to create a new blank calendar.
Click on “Create Calendar” to finish creating a new blank calendar.
Import a Google Calendar
Another way to create new calendar to import from Google Calendar which can serve as an alternative backend calendar manages system.
Google now requires both its Calendar API key and Calendar ID. As of Nov 17th 2014, Google shut down V1 and V2 of their Calendar APIs. You can no longer using the Google Calendar public URL for import.
You must first have a Google Calendar API Key:
- Go to the Google Developer Console and create a new project (it might take a second).
- Once in the project, go to APIs & auth > APIs on the sidebar.
- Find “Calendar API” in the list and turn it ON.
- On the sidebar, click APIs & auth > Credentials.
- In the “Public API access” section, click “Create new Key”.
- Choose “Browser key”.
- If you know what domains will host your calendar, enter them into the box. Otherwise, leave it blank to allow any hosts. You can always change it later.
- Your new API key will appear in a few seconds.
- Copy the key for later use.
Make your Google Calendar public:
- In the Google Calendar interface, locate the “My calendars” area on the left.
- Hover over the calendar you need and click the downward arrow.
- A menu will appear. Click “Share this Calendar”.
- Check “Make this calendar public”.
- Make sure “Share only my free/busy information” is unchecked.
- Click “Save”.
Obtain your Google Calendar’s ID:
- In the Google Calendar interface, locate the “My calendars” area on the left.
- Hover over the calendar you need and click the downward arrow.
- A menu will appear. Click “Calendar settings”.
- In the “Calendar Address” section of the screen, you will see your Calendar ID. It will look something “sdfalskjfasfjsasdf12323asdf@group.calendar.google.com”.
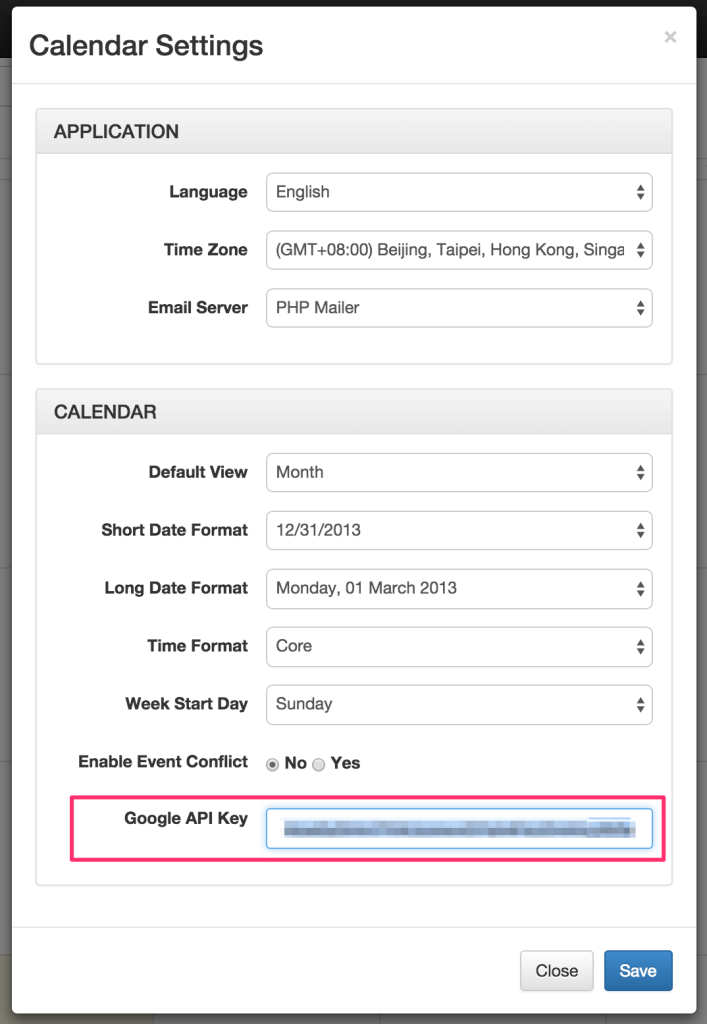
Final Step: Save both Google Calendar API Key and ID in Our Event Calendar
Now, you should have both Google Calendar ID as well as its API Key:
TL;DR? Watch screencast! Google Calendar Import
- Manage Existing Calendars
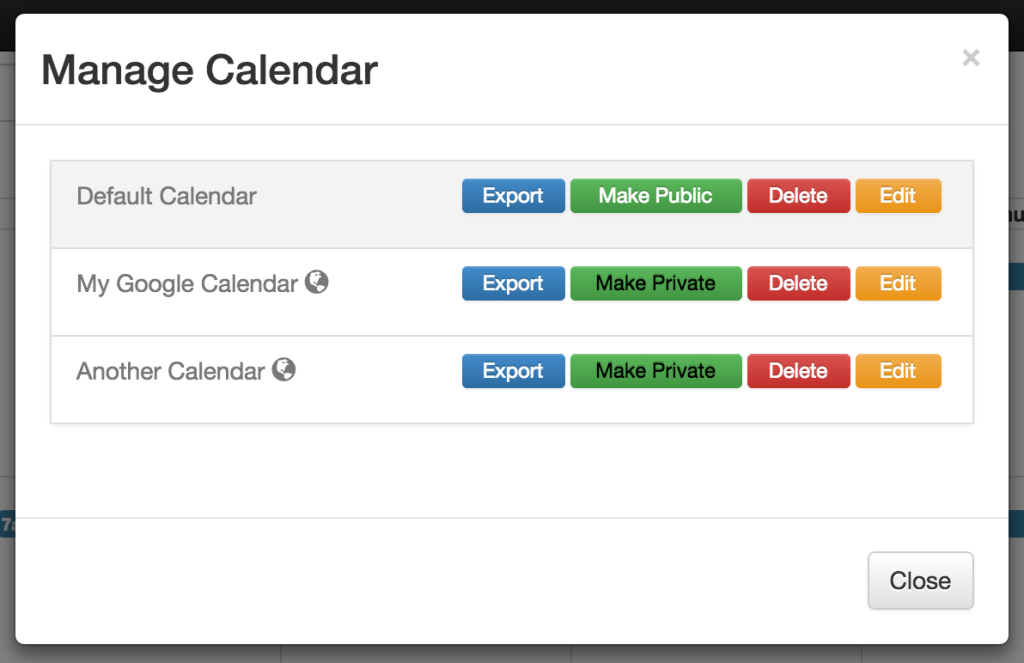
Click on the gear icon to open the Manage Calendar window:
The Manage Calendar Window has the following options:
- Export – export the selected calendar in .ical format (more on iCalendar format).
- Make Public/Private – When set to private, the calendar is not publicly accessible.
- Delete (Calendar) – Delete a calendar. Warning: all its events will be removed permanently!
- Edit (Calendar) – Edit calendar title, description, and color etc.
Note that the globe icon links to a public URL for that specific calendar.
- Calendar Event (New/Edit) Window
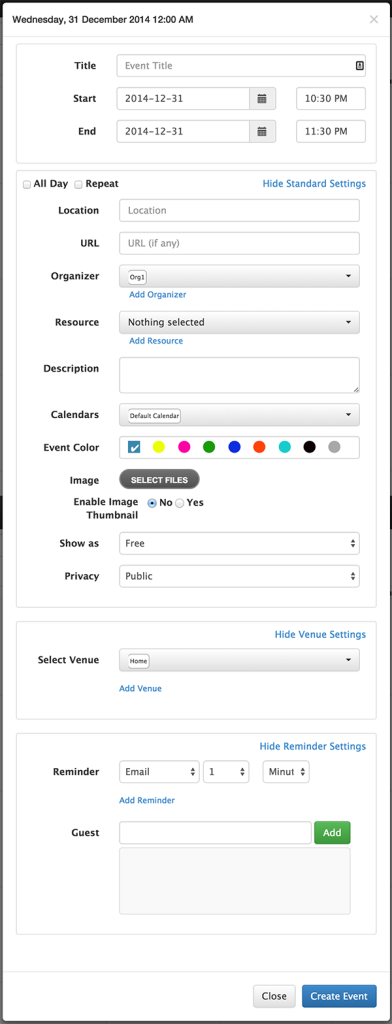
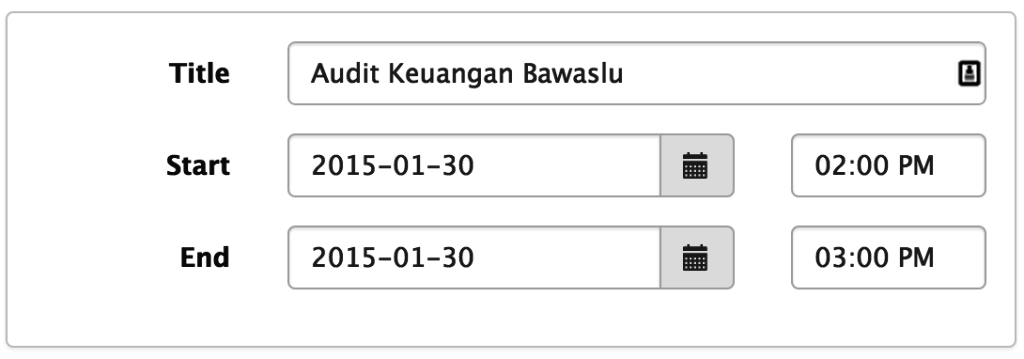
In event window, an user can specify event basic information, Title, Start and End Date and Time, repeating event section and additional event information, plus email reminders.
The event window comprises the followings:
- Basic Event Information
- Title
- Start & End Date Time
- Standard Settings:
- Repeating Events
- Description
- Organizer
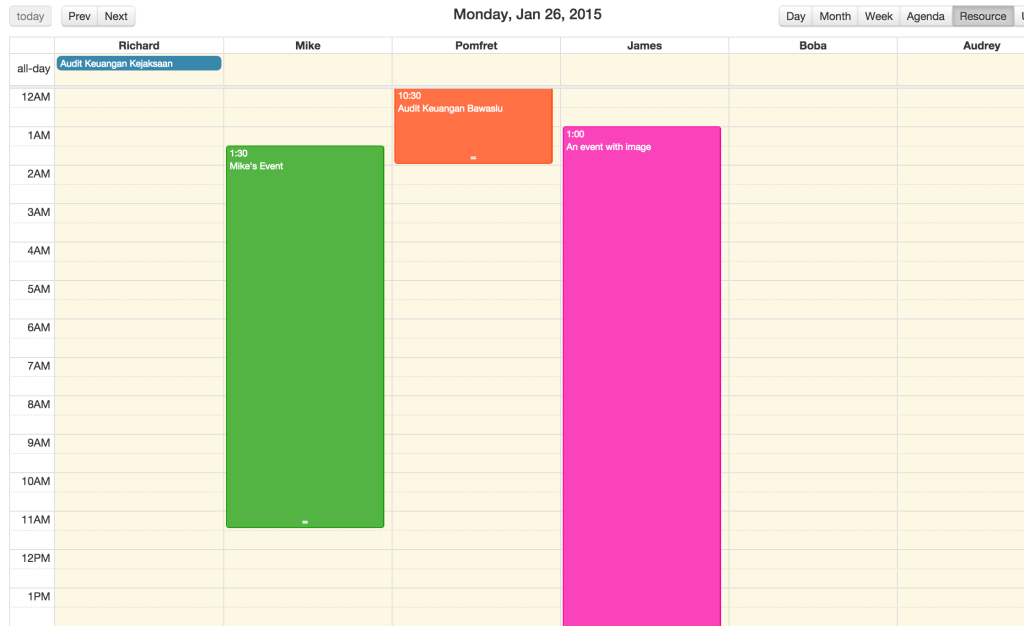
- Resource
- Background Color
- Event Image
- Privacy
- Venue
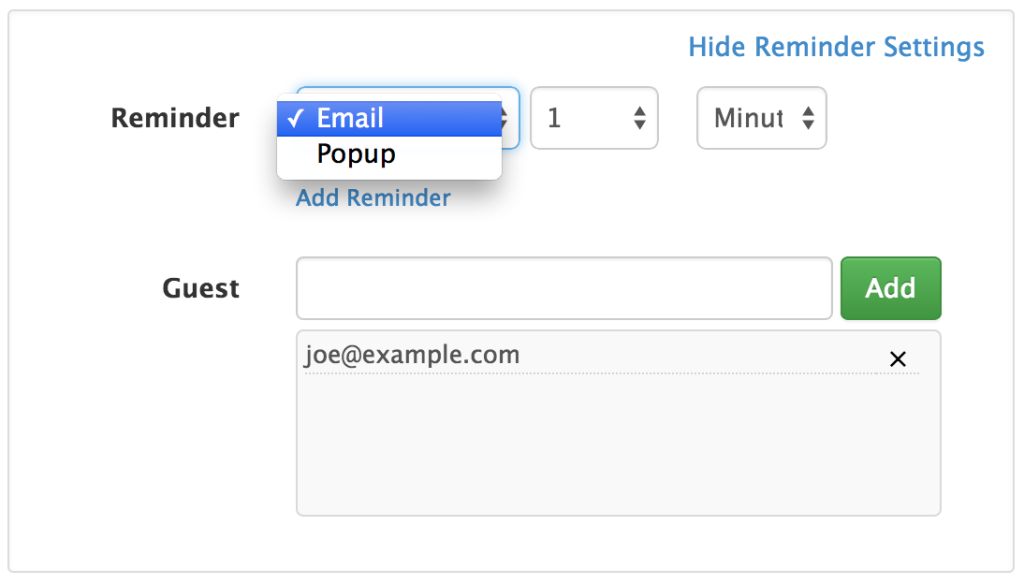
- Reminder
- More to come…
Note that some features are only available in paid version such as repeating events, multiple calendars, and reminder.
- Basic Event Information
- Create a Basic Event
- Repeating Events
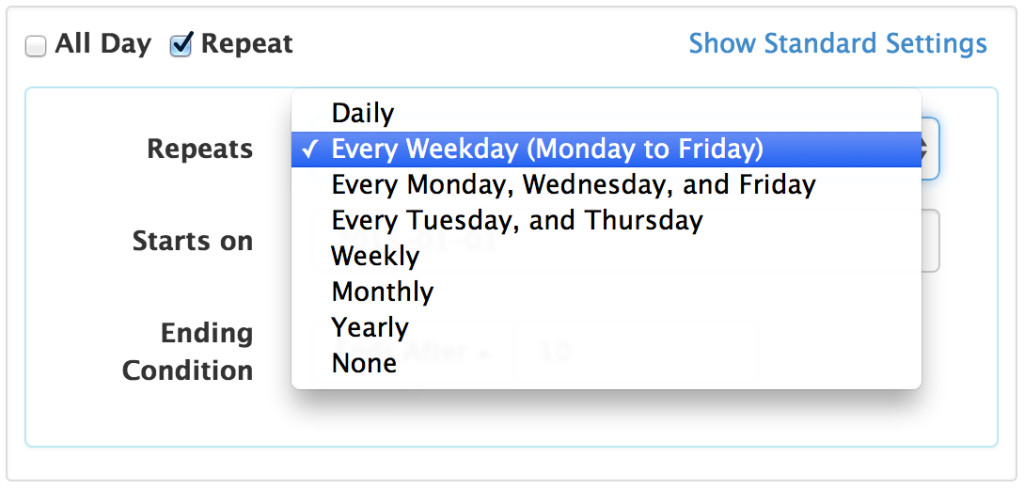
PHP Event Calendar supports repeating events. To set recurring events, in Event Edit Window (shown in previous post), check “Repeat” checkbox in Standard Settings section. Common event intervals are readily available to choose from.
Users can also specify Start date and Ending Condition. The repeat patterns are designed similar to Google Calendar has.
- Additional Event Information
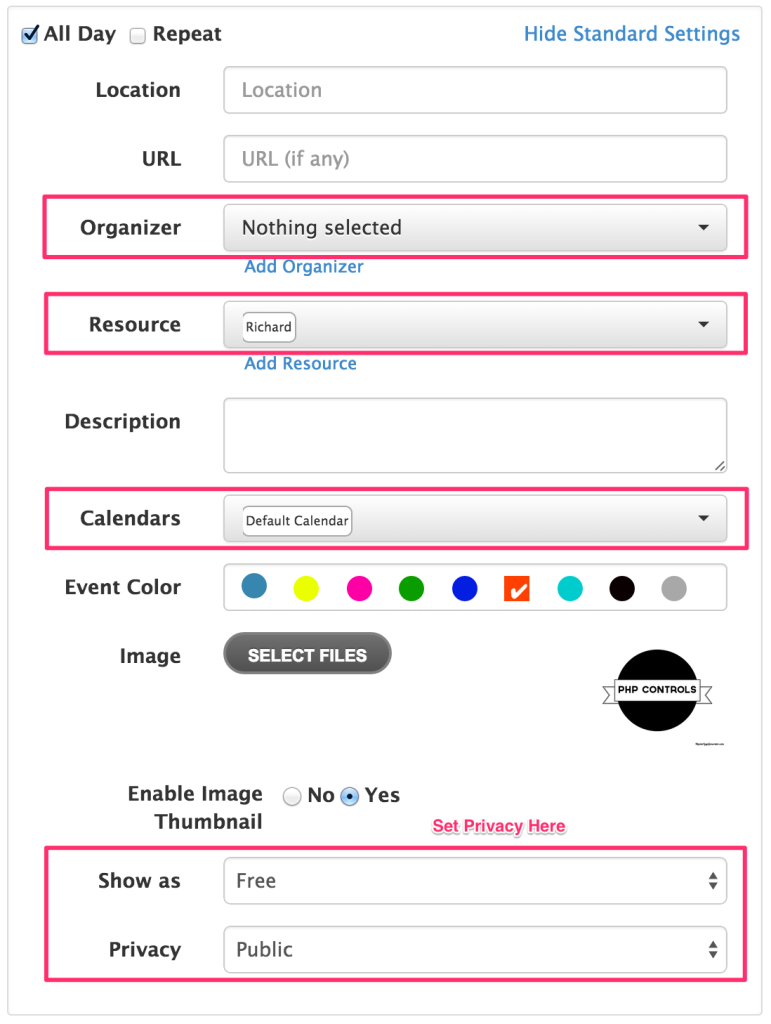
Enter additional event information in the Standard Settings section.
- Organizer
- Click “Add Organizer” to add one first if it’s not already existed in the dropdown.
- Resource
- Click “Add Resource” to add a resource first
- Calendar
- Select an existing calendar from the dropdown
- Privacy
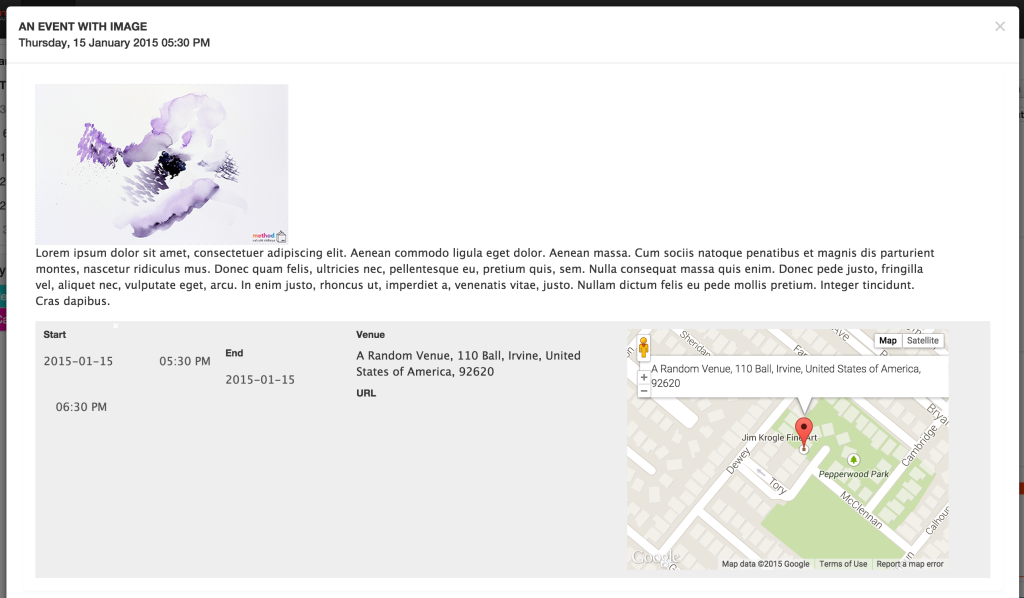
You can also update an image for the event and choose whether to display the image thumbnail in month view only.
- Organizer
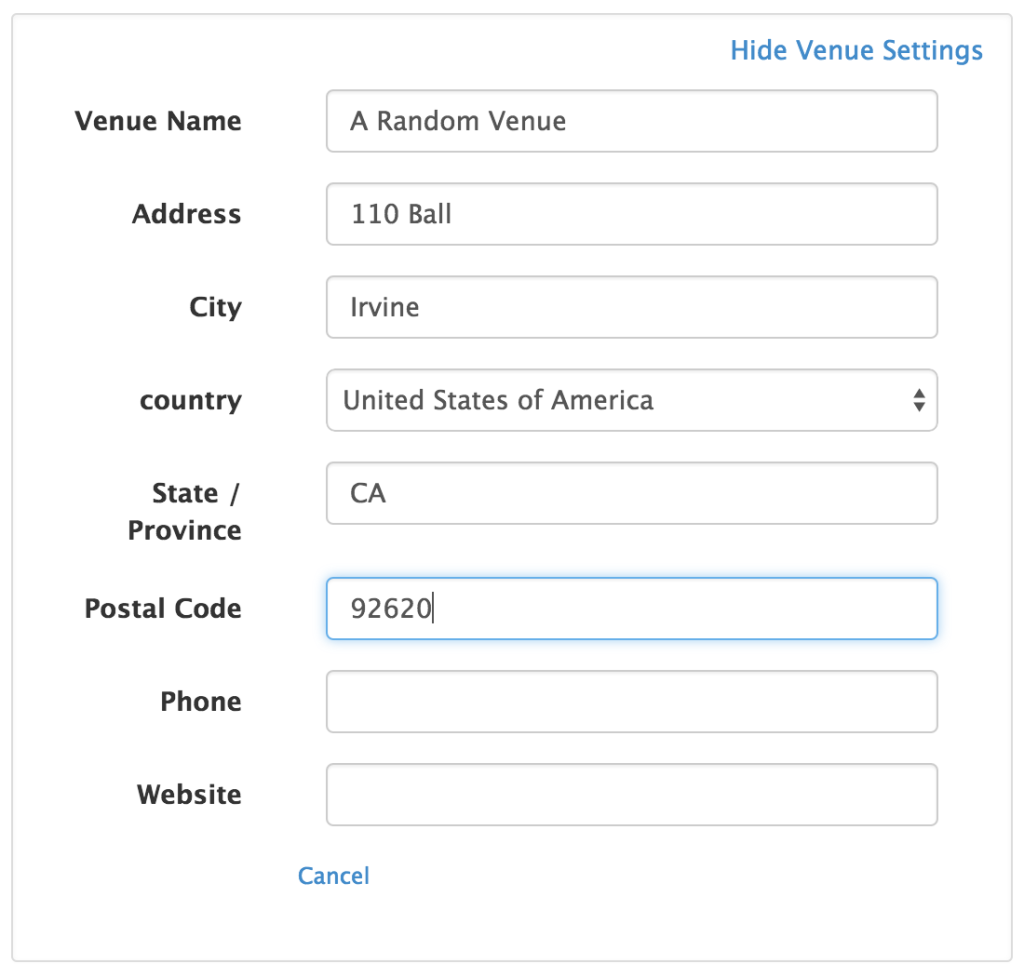
- Enter Event Venue
- Event Email/Popup Reminder
PHP Event Calendar packs with advanced features such as repeating events and event reminder. For event reminder works with hosts with cron job enabled to send out emails reminders time specified by users.
One or more emails are supported for event email reminders.
It’s required to setup a CRON job on your server for the following script. The CRON job will trigger the script to execute and find all the reminders and email them (Additional read: How to setup CRON job?).
crons/events-reminder.php
Example to setup cron to run reminder every 30 min
*/30 * * * * cd /Users/richard/Sites/localhost/phpEventCalendar/crons && php events-reminder.php
Lastly, the calendar uses PHPMailer for sending emails. Set SMTP in sendEmail() function in the following file:
server/classes/cls_core.php
In the future release, users can set reminders to send SMS text messages or voice reminders to telephones.
Troubleshoot
Create future events with reminders in calendar.
In your terminal, you can try test send reminder manually first.
cd /var/www/html/phpEventCalendar/crons
php events-reminder.php
Check if any errors returns and fix them accordingly. If it look good, check email in your inbox, if you see the reminder email. Congrats, it works!
Cron could also be an issue at times. Run the following to get cron logs and find out if any errors and fix them accordingly.
grep cron /var/log/syslog
Addition Resource Setting up Cronhttps://crontab.guru/every-30-minutes
https://blog.dennisokeeffe.com/blog/2021-01-19-running-cronjobs-on-your-local-mac
- Resource View (Full Version Only)
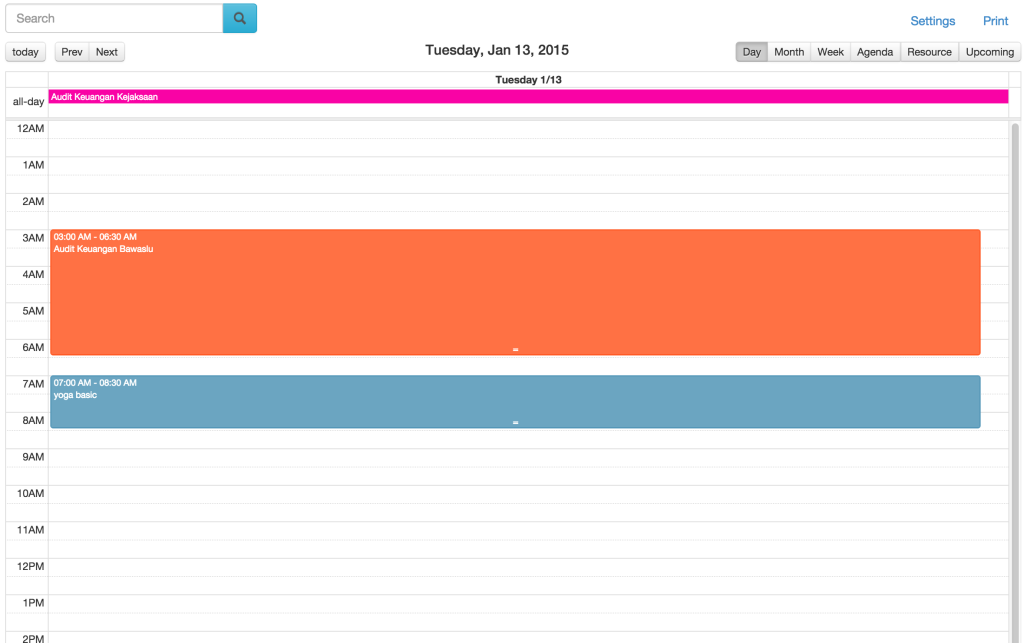
- Calendar Day View
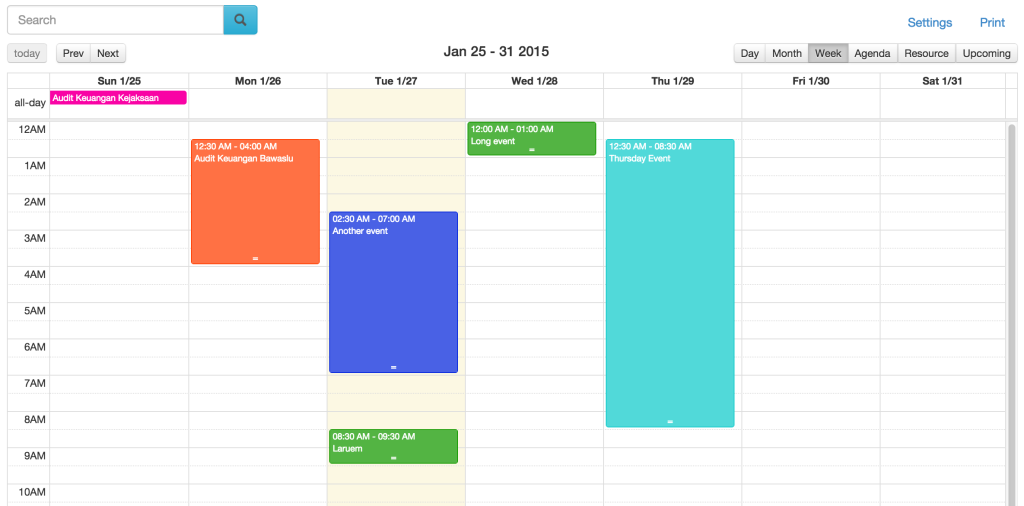
- Calendar Week View
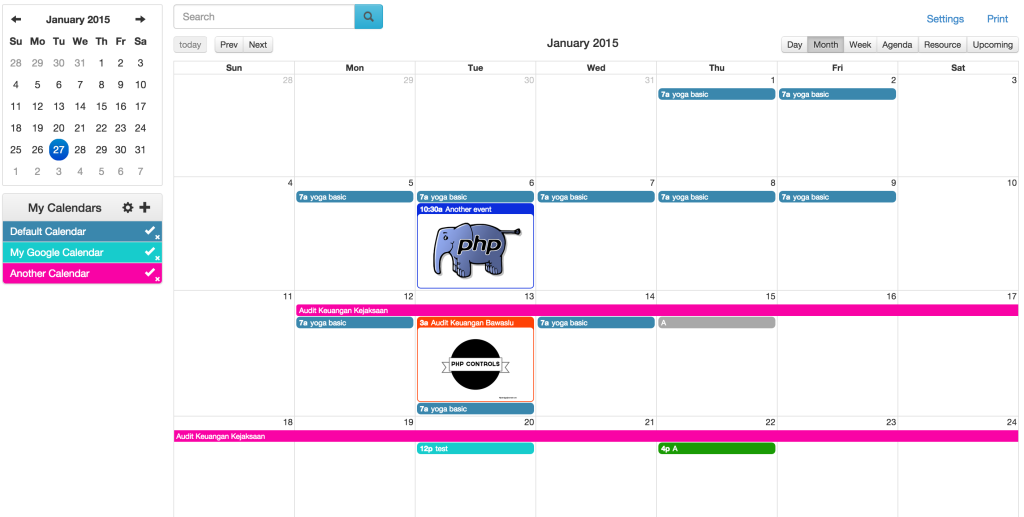
- Calendar Month View
- Calendar Agenda View
Agenda view is a list of your events in chronological order. It provides a quick glance at your calendar with a list of upcoming appointments, all-day and multiple day events. All-day and multi-day events are listed at the start of each day. Days without events are not shown. A black line indicates where today begins.
- Upcoming Events View


